Mongodb-安装配置
环境
1
2
3
| centos7
mongodb 6.0.11
mongodb shell 2.0.1
|
下载
mongodb下载,这里选择6.0.11,tar.gz
https://www.mongodb.com/try/download/community
mongodb shell命令行客户端下载,这里选择2.0.1,tar.gz
https://www.mongodb.com/try/download/shell
windows客户端,studio-3t
https://download.studio3t.com/studio-3t/windows/2023.6.2/studio-3t-x64.zip
mongodb安装
1
2
3
4
5
6
7
8
9
10
11
12
13
14
15
16
17
18
19
20
21
22
23
24
25
26
|
cat << EOF > mongod.conf
systemLog:
destination: file
path: /data/mongodb/logs/mongodb.log ## 日志
logAppend: true
storage:
dbPath: /data/mongodb/data ## 数据目录
net:
bindIp: 0.0.0.0
port: 27017 ## 默认端口
processManagement:
fork: true
EOF
/data/mongodb/bin/mongod -config /data/mongodb/mongod.conf
./mongosh
> show dbs
test> show databases
admin 180.00 KiB
config 60.00 KiB
local 72.00 KiB
|
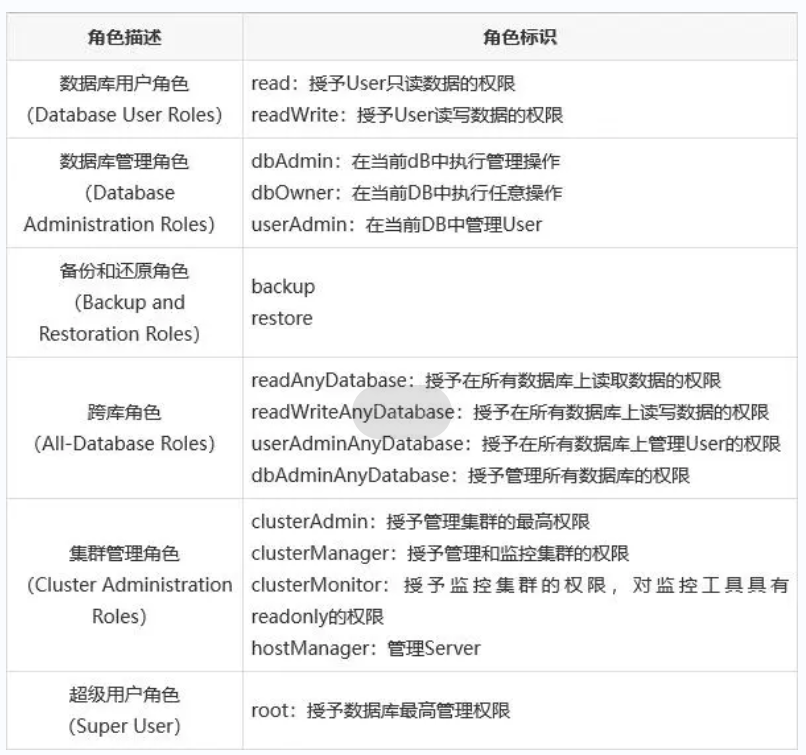
创建管理员,并设置权限
默认情况下,mongdb没有开启权限验证,需增加管理员,并开启验证
1
2
3
4
5
6
7
8
9
10
11
12
13
14
15
16
17
18
19
20
21
22
23
24
25
26
27
28
29
30
31
32
33
34
35
36
37
38
39
40
41
42
43
44
| ./mongosh
db.createUser(
{
user: 'root',
pwd: '123456',
roles: [{role:'root',db:'admin'}]
}
)
{ ok: 1 }
db.createUser(
{
user: 'root',
pwd: '123456',
roles: [{role:'root',db:'admin'}]
}
)
db.createUser(
{
user: 'userAdminAnyDatabase',
pwd: '123456',
roles: [{role:'userAdminAnyDatabase',db:'admin'}]
}
)
db.createUser(
{
user: 'test',
pwd: '123456',
roles: [{role:'readWrite',db:'test'}]
}
)
db.createUser(
{
user: 'test',
pwd: '123456',
roles: [{role:'dbOwner',db:'test'}]
}
)
|
修改配置,增加登录验证
1
2
3
4
5
6
7
8
|
security:
authorization: enabled
./mongosh -u root -p
|
基本操作
参考
http://it028.com/mongodb-create-database.html
老年佛系运维 | biglovewheat@126.com